创建项目
yarn create vuepress my-vuepress-demo
打开项目并初始化
    cd my-vuepress-demo
    npm install
    npm run dev
接下来就可以顺畅使用了
侧边生成方法 1
在.vuepress > config.js文件里配置
import { defaultTheme } from '@vuepress/theme-default'
import { defineUserConfig } from 'vuepress/cli'
import { viteBundler } from '@vuepress/bundler-vite'

// 站点配置文件
// https://v2.vuepress.vuejs.org/zh/reference/config.html#head
export default defineUserConfig({
  lang: 'zh-CN',
  title: 'VuePress',
  description: 'My first VuePress Site',
  // 主题配置
  theme: defaultTheme({
    logo: 'https://vuejs.press/images/hero.png',
    // 首页顶部菜单配置
    navbar: [
      { text: '首页', link: '/' },
      { text: 'ABC 页面', link: '/abc.html' },
      {
        text: '更多',
        children: [
          { text: '文档1', link: '/docs/doc1.html' },
          { text: '文档2', link: '/docs/doc2.html' },
        ],
      },
    ],
    // 这里就是侧边栏配置了
    sidebar: {
      '/foo/': ["","one","two"],
      '/abc': [""],
    },
  }),
  bundler: viteBundler(),
})
sidebar就是配置方法 '/路由': [ "*1", "*2", "*3"]
*1 初始页面 默认空则为README.md
*2 则为子路由1
*3 则为子路由2
foo                                     参考以下路径
├─ README.md
├─ one.md
└─ two.md
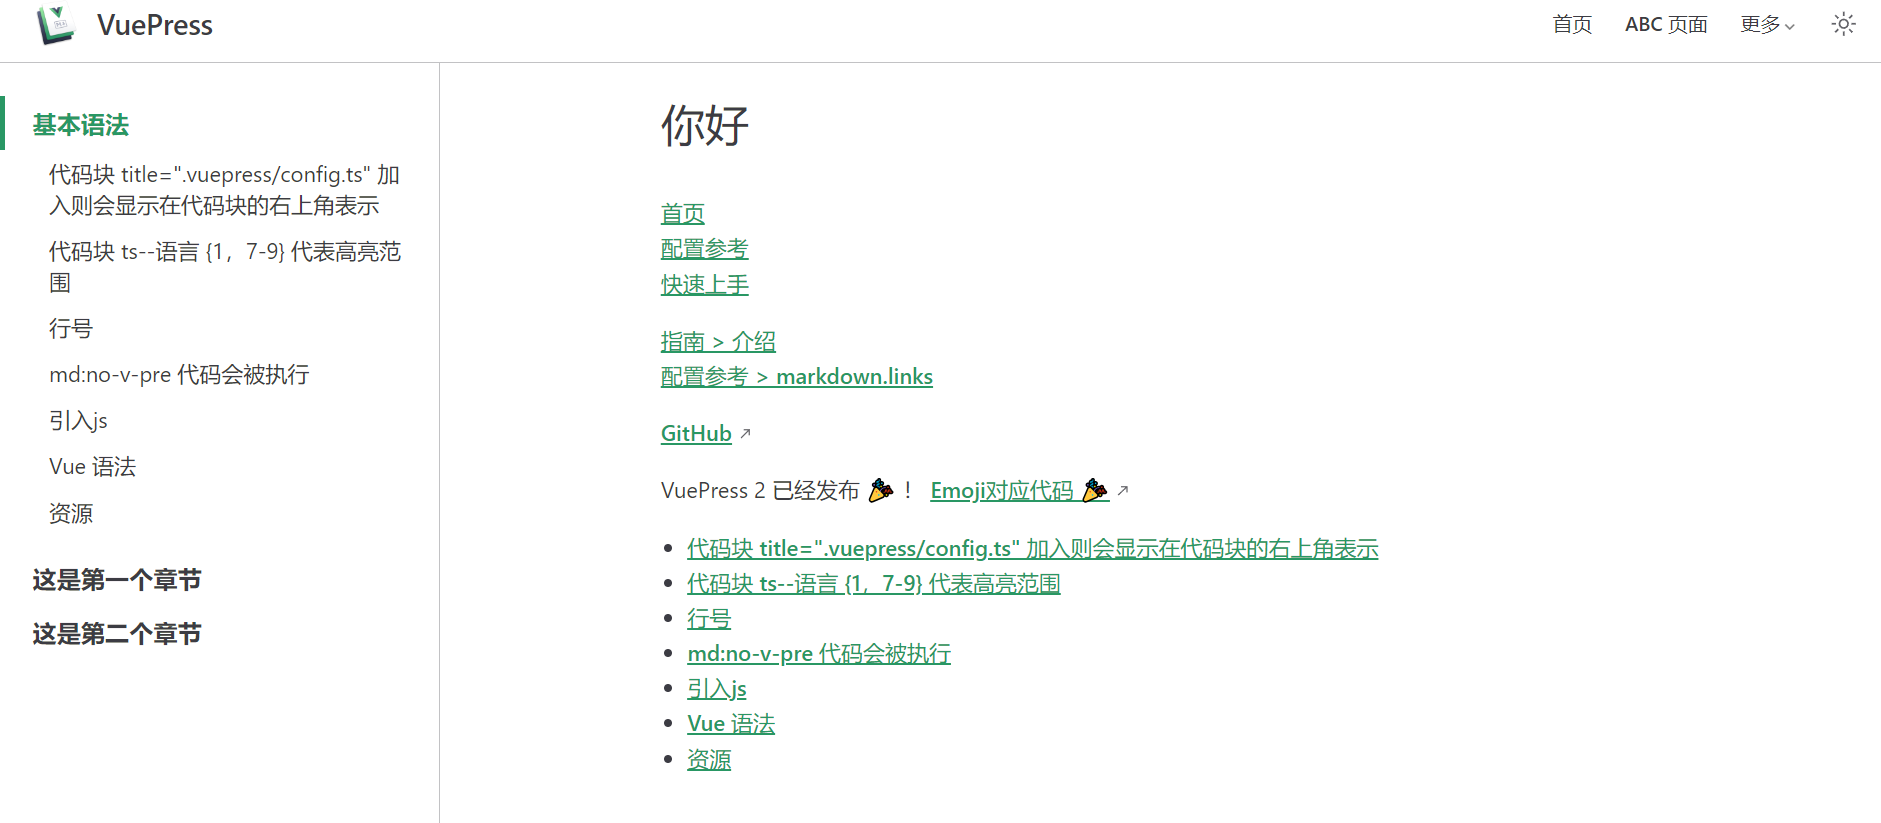
得到的效果就是

左侧基本语法 就是 /foo/README.md 路由
- http://localhost:8080/foo/
左侧 这是第一个章节 就是/foo/one.md 路由- http://localhost:8080/foo/one.html
左侧 这是第二个章节 就是/foo/two.md 路由- http://localhost:8080/foo/two.html
侧边生成方法 2
和上面一样也需要到config.js里配置sidebar
只需要配置第一个选项也就是 "/abc" : [""]
随即只需要在文档中 使用 两个## 就可以自动进行生成侧边栏了